Configuring your Barcode Scanner
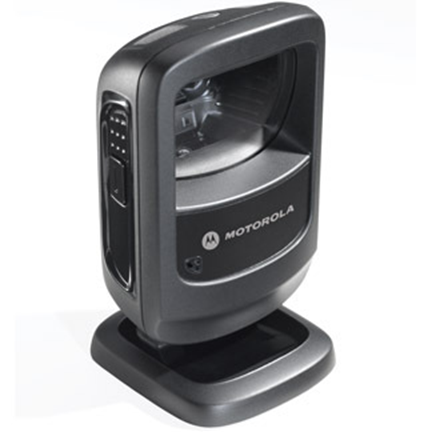
This guide will help you configure your Motorola Symbol DS9208 barcode scanner for use with Accentis Enterprise. While this document can be used as a general guide for setting up a barcode scanner, it specifically applies to the barcode scanner listed.
Technical details
Accentis Enterprise communicates with barcode scanners using a serial port (COM port) interface. A barcode scanner with a USB connection to your computer will require software loaded onto your computer that emulates a serial port. The barcode scanner will also need to be configured so that it is in Serial Port Emulation mode and it will also need to be configured to ensure that it transmits a carriage return and line feed at the end of each scanned barcode.
Before you begin
Before you begin to configure your barcode scanner for use with Accentis Enterprise, you must first ensure that:
- You have a Barcode scanner with USB interface cable
- You have a spare USB port on your computer
- You have sufficient privileges on the computer to install device drivers
- You are connected to the internet
- You are able to log in to Accentis Enterprise with permissions sufficient to set System Preferences
- You have printed this document (you will need to scan barcodes from it)
Step 1: Download and install the Barcode Scanner drivers
Before beginning the installation process, ensure that your barcode scanner IS NOT CONNECTED TO YOUR PC AT THIS POINT. If the scanner is connected, unplug it before continuing.
Using a barcode scanner in COM port emulation mode requires the use of specific devices driver, which need to be downloaded from the relevant manufacturer’s website. At this point you should download these device drivers and install them on your PC. For links and specific instructions for the barcode scanner listed above, please see Appendix 1.
Please use the USB CDC drivers.
Once the installation of device drivers is completed, restart your computer before moving to step 2.
Step 2: Plug in the Scanner
Once the COM port emulation drivers are installed, you can plug the barcode scanner into any available USB port in the PC. Note that you should choose a conveniently located USB port, as moving the scanner to another USB port will most likely result in device drivers needing to be reinstalled.
If successful, you should see a popup appear saying that drivers are installing and (on Windows 7) you will then see a popup to say what comm. port the device has been given.
Green lights on the top of the device will now be on.
If the device remains undetected on your PC (Page 6-5 in user manual)
The device may not be in CDC mode. Scan the below barcode and wait 20- 30 seconds. If the scanner does not auto-detect the new mode unplug for 1 minute then plug back in. The scanner should now be detected as a USB CDC device in Windows.

Step 3: Configure the Barcode Scanner
Most barcode scanners have the ability to run in various modes and perform different functionality. As such, most barcode scanners need to be given a set of instructions to ensure they are in the correct mode for use with Accentis Enterprise. These instructions are performed by scanning a sequence of barcodes typically found in the User manual provided with the barcode scanner. In general, you should first ensure that the barcode scanner is set back to its factory defaults then switched to COM port emulation mode and that the CR character code is appended to the end of each scan.
When scanning configuration barcodes, pause for a period of 5 seconds between scanning each barcode.
For instructions and configuration barcodes for the barcode scanners listed above, please see Appendix 2.
Step 4: Configure Accentis Enterprise for your Barcode Scanner
The final step is to tell Accentis Enterprise how to communicate with the barcode scanner. At this point, you should log into Accentis Enterprise then go to System > Preferences. Click on the Barcoding item in the list on the left and then click Edit.
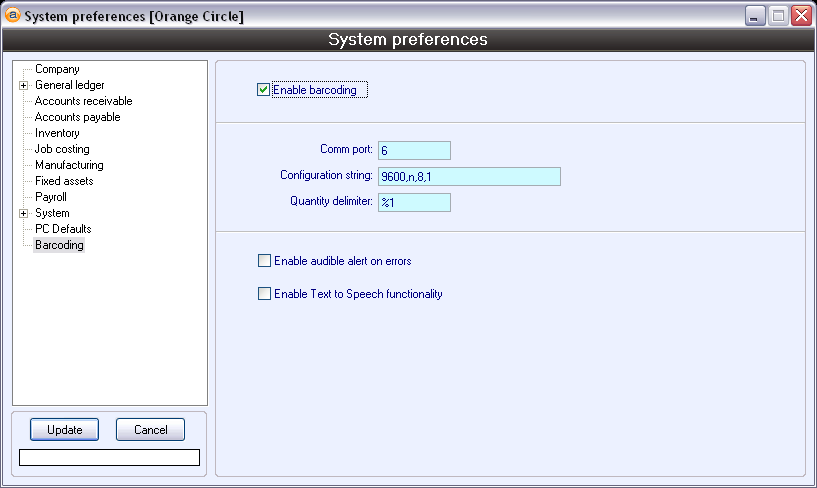
Once you have moved into Edit mode, tick the “Enable barcoding” option. This informs Accentis Enterprise that you will be using a barcode scanner and gives you access to more configuration fields.
By default, the configuration fields should contain the default settings that will work with most barcode scanners, but at this point you should ensure that the “Configuration string” and “Quantity delimiter” fields are set as per the screen shot above.
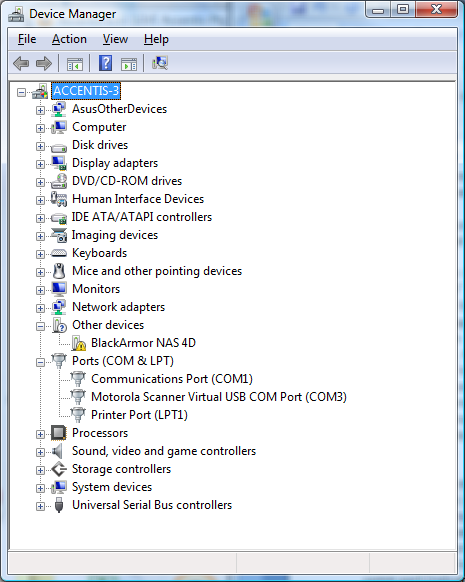
The configuration field that we need to pay most attention to is the “Comm port” field. When you installed device drivers and connected your barcode scanner to the pc, a comm port was automatically assigned to the barcode scanner by the Windows operating system. For Accentis Enterprise to recognise your barcode scanner, it needs to be told which comm port has been assigned to the barcode scanner. You can find details of the assigned comm port by opening the “Device manager” within Windows and navigating to the “Ports (COM & LPT)” section, as shown in the screen shot to the right. If you are unsure how to locate these details, please contact either your IT support or Accentis support.
Most computers will only assign a comm port in the range 1 to 12 for your barcode scanner, so if necessary you can try entering each of these numbers one at a time, updating the system preferences between each. If Accentis Enterprise does not find the barcode scanner on the specified comm port, you will be shown an error. Continue this process until you enter the correct comm port (indicated by no error when updating).
Step 5: Test the Barcode Scanner
Once both the barcode scanner and Accentis Enterprise have been configured, you are able to go to the Barcode test facility (System > Database Administration > Barcode test facility) to check that the barcode scanner is configured to work with Accentis Enterprise as expected.
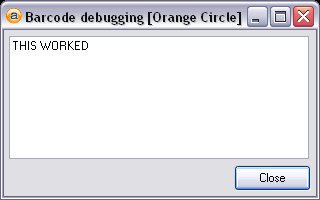
With the Barcode test facility open, scan the barcode shown below.

If the barcode scanner is communicating correctly with Accentis Enterprise, you should see the text “THIS WORKED” appear in the Barcode test facility.
If this step does not display any text in the debugging box, it is possible that the carriage return/line feed option is not set. Scan the following barcode from the quick start guide which sets the “Enter Key (Carriage Return/Line Feed)” option.

Rescan the test barcode above to see if the “THIS WORKED” text displays.
Step 6: Additional configuration
Your Motorola Symbol DS9208 barcode scanner has many configuration options, each of which can be set by scanning control barcodes. For a complete list of these options and their associated barcodes, please consult the user manual for your scanner.
Further Help
If you find that after following the steps above, your barcode scanner is not communicating with Accentis Enterprise, please follow these steps:
- Unplug the barcode scanner, leave it unplugged for 30 seconds, plug it back in, then run through the steps above again. Leave a longer delay between scanning the configuration barcodes (10+ seconds). Run the test facility at the end to see if this helped.
- You’ll notice after scanning each of the configuration barcodes, the scanner responds with a sequence of beeps. Make note of the pitch of each beeps in the sequence. E.g.: “high-low-high" of “low-high”
- Make note of the operating system that you are running (ie Windows Vista, Windows XP, Windows 7 etc.) and whether it is 32 or 64 bit.
- Make note of which model barcode scanner you are configuring. Note that specific configuration barcodes shown in the appendices relate only to the barcode scanners listed in the “Applies to” list above. For models not in the above list, please consult the user guide for the barcode scanner for the appropriate configuration barcodes.
- Call Accentis on (07) 3256 6875 or email [email protected] with the above information.
Other Model Barcode Scanners
If you have a barcode scanner model not listed in this document which you are unable to configure, please contact us for assistance. Please have the exact brand and model number of the barcode scanner handy. Also make sure you have any drivers or manuals that came with the scanner available, as we may need to use these for configuration.
Appendix 1
Barcode scanner device drivers
Motorola Symbol DS9208
Link to current device drivers: https://www.zebra.com/us/en/support-downloads/scanners/general-purpose-scanners/ds9208.html
- Visit the link above to locate the drivers for your specific barcode scanner and Windows version.
- Download the driver installation files and unzip it to a temporary folder.
- Locate the file named “Motorola Scanner USB CDC Driver for Windows 7 64-bit” in this temporary folder and run it to install the device drivers.
- You shouldn’t need to change any settings during this installation.
Note 1: When running this file on operating systems that uses “User access control” (ie: Windows Vista and newer), right click and choose “Run as Administrator” rather than running directly.
Note 2: This device supports 32bit and 64bit operating systems.
Note 3: All barcode scanner links located on the Accentis website refer to the official manufacturer barcode scanner pages.
Appendix 2
Additional configuration barcodes
Motorola Symbol DS9208
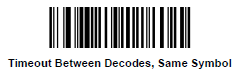
Timeout between same symbol: Depending on how you have mounted your barcode scanner, you may find that each barcode you scan is actually run through the scanner beam twice. This option allows you to set a timeout period before another scan of the same barcode will be reprocessed.
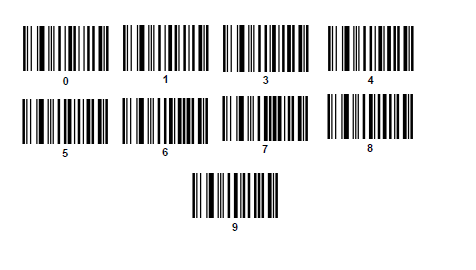
To configure this timeout period, scan the “Timeout Between Decodes, Same Symbol” barcode below and then scan two numeric digit barcodes from the list at the bottom of this page.
The recommended timeout period is 1 second, which can be configured by scanning the “Timeout Between Decodes, Same Symbol” barcode followed by the 1 barcode and then the 0 barcode (for 1.0 seconds).