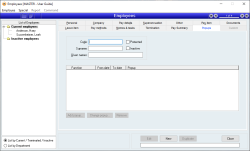
Employees
Employees represent people who are eligible to be remunerated using the Payroll subsystem.
Employee records contain the following information:
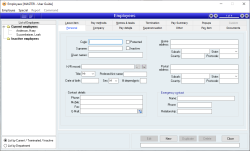
- Personal information (name, address, emergency contact etc.)
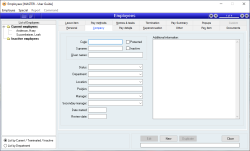
- Company information (position, department, location, type and date of employment etc.)
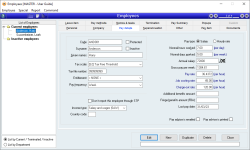
- Pay information (entitlement, time worked, salary, hourly rate, pay frequency, FBT info etc.)
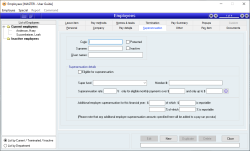
- Superannuation information
- Payment methods (how much to pay, by which methods to cash / accounts)
- Pay items (types of pay and how much)
- Leave information (types of leave, balances & values, accrual rates etc.)
- Employee memos (date-stamped notes detailing employee history)
- No practical limit to the number of pay items that can be assigned per employee
- No practical limit to the number of leave items that can be assigned per employee
- Employee codes are FlexiCode
- Customisable payment methods can be entered for payments, including support for electronic payment
- Fringe benefits payments can be stored per employee
- Employee email address can be recorded for pay notifications
- Unlimited number of date-stamped notes can be recorded against an employee
- Supports Pending delete status
- Employees can be terminated with complete termination circumstances and payment information
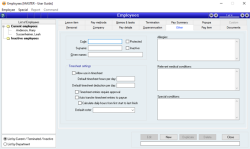
- Employees can enter Timesheet information.
- Shows past and current Pay and Leave items (for example, if an employee changes entitlements of types of pay)
- An employee can be flagged as requiring termination on their next pay
- Allergies and medical conditions can be entered per employee
- Customisable rate of employer-sponsored superannuation per employee
Module: Payroll
Category: Employees
Activation: Main > Payroll > Employees
Form style: Multiple instance, SODA
Special actions available for users with Administrator permissions:
- View and edit Protected employees.
- View and edit deleted employees with the Allow display of deleted records menu option.
- Change the User ID of the Entered by field of memos.
- Edit memos entered by other users.
Database rules:
- An employee cannot be deleted if any of the following circumstances exist:
- The employee is included in a Pay run
- The employee has any leave accumulated
- Any year-to-date figures for the employee’s Pay items are not zero
This displays the list of all employees that is currently defined in the system. As you click on each item in the Employee list, the details for that employee are shown at the right of the list.
When you are ready to edit or delete an employee, ensure that you have selected the correct employee in the list before clicking on the Edit or Delete button.
The Employee list is sorted by employee surname followed by the first names of employees that have not been terminated. Terminated employees are shown at the end of the list.
Reference: pop up menu, memo, expandable
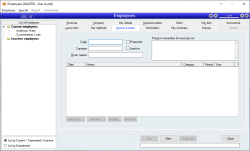
This pop-up menu displays a box that allows notes for the next pay run to be entered for the current employee. For more information on this field, see Things to remember for next pay run
Reference: Yes/no
This options allows you to change the grouping of the employee list to show the list in two groups: (1) Active employees (2) Inactive employees. The list is sorted alphabetically by the employee’s last name.
Reference: Yes/no
This options allows you to change the grouping of the employee list to show by their department first, and then sorted alphabetically by the employee’s last name within each department.
Reference: Yes/no
This indicates that the employee can only be seen and managed by an Administrator of payroll (permissions Administrator against employees). It is designed to allow you to segment your workforce so that some employees can have their pay runs processed by a “normal” payroll clerk, whereas special employees such as managers or business owners can be protected and only visible to Administrators.
If you don’t have administrator permissions , you will not be able to:
- See protected employees in the employee list
- Process a pay run for protected employees
- View a pay run that contains protected employees
- View a payroll payment in A/P that contains protected employees
If you have any customised payroll reports, you need to be careful to specify to Accentis when you have them designed, whether they should or shouldn’t show protected employees.
Reference: Yes/no
Ticking the inactive checkbox will make the employee inactive without terminating them. When an employee is inactive, they are moved to the inactive employee list and will not show on reports for current employees. When the checkbox is unticked, the employees will show in the current employee list and in the default current employee reports.
Reference: text, read-only, QuickList
This field is a link to the corresponding Human Resources record for the employee. There may be multiple employee records all linking back to the one Human resources record because an employee may have been employed multiple times under different circumstances. However, a Human resources record represents a person, rather than employee, and there is usually only one Human resources record per person.
Reference: select from list or text(6), mandatory
This is the title by which the employee is addressed. If the required title does not appear in the list, you can type it in manually, but it will not automatically appear in the list for other employees.
Reference: text(30), mandatory
This is the preferred or informal name for the person which will usually be displayed in reports. Official payroll documents and lodgements will use the employee's full Given names, but most reports will use the Preferred Name. If you have reports customised, you can decide which name you would prefer to display. An example is showing an employee as "Bill Smith" as opposed to "William Forsythe Fortherington Smith".
Last edit 30/04/20
Reference: select from list, mandatory
This is the sex of the employee and can be one of Male, Female or Other (-).
Last edit 27/10/20
Reference: number
This is the number of dependants of the employee. This number should be the same number the employee would normally use in any tax or social security documentation. It is used to determine if a payment on death of an employee is paid to dependants, and if so what tax calculations are performed.
Reference: contact
These are the contact details for the Employee after hours. These details are used only for reference information should you wish to contact the employee at home.
Reference: address
This is the usual home address of the employee. It is used only for reference purposes when viewing the Employee form.
Reference: address
This is the usual postal address of the employee. It is used only for reference purposes when viewing the Employee form and for searches / reports.
Reference: text(50)
This is the name of the person to be contacted in case of an emergency involving the employee.
Reference: text(20)
This is the telephone number of the Emergency contact specified for the employee.
Reference: text(20)
This is the relationship of the Emergency contact to the employee, for example: wife, husband, mother etc.
Reference: select from list, mandatory, HotEdit
This is the employment status of the employee which can be defined using Payroll > Setup > Employee status or pressing F12 on the field. The employee status is only used for reporting and is not used in any calculations of wages, tax, leave or superannuation. This field is used to report for Single Touch Payroll and must contain valid status entries.
Reference: select from list, mandatory, HotEdit
This is the Department to which the employee belongs.
The department to which an employee belongs determines which General ledger accounts are updated for salary and leave expenses, leave provisions and superannuation expenses during a pay run for that employee.
The list of available departments is set up using the Departments form, however you can press the HotEdit key to add new departments which will then add them to the list for selection.
Reference: select from list, mandatory, HotEdit
This is the physical Location at which the employee performs their work or is based.
Locations must be added via the Location form before they will appear in this list, however you can press the HotEdit (F12) key to add new locations which will then add them to the list for selection.
Reference: Text(50)
This is the position of the employee within your organisation (e.g. Electronics technician, Sales manager). This is used only for reference purposes on searches and reports.
Reference: select from list, mandatory
This is another user in your database that has been designated as the manager for the current employee. An employee’s manager is able to:
- Approve this employee’s timesheet without needing timesheet Administrator permissions
- View their staff on timesheets, providing the option Allow users to view timesheets for their managed staff is also set.
An employee’s manager may also have a manager, and this hierarchy is honoured with the permissions to approve and view timesheets for up to 4 x levels of management. This means that the ultimate manager of everyone (if you had such a person) will have the ability to approve anyone’s timesheet.
When displaying the employee’s manager on the timesheet form and on various reports, typically only the primary manager is shown as “the” employee’s manager.
Last edit 21/05/20
Reference: select from list
This is another employee in your database that has been designated as an alternate or secondary manager. A secondary manager is allowed to perform the same functions on this employee as the primary Manager - it’s just way of enabling more than one person to manage the employee’s timesheet approvals.
An employee’s secondary manager may also have a manager, and this hierarchy is honoured with the permissions to approve and view timesheets for up to 4 x levels of management. This means that the ultimate manager of everyone (if you had such a person) will have the ability to approve anyone’s timesheet.
Last edit 21/05/20
Reference: Memo, expandable
This field contains any other information about the employee in respect to their position within your organisation. It is used only for reference purposes and can contain as little or as much information as you like.
Reference: select from list, mandatory, HotEdit, Quicklist
This is the tax scale that will be used to calculate the tax on an employee’s pay each pay run. Tax is calculated on the employee’s taxable income based on parameters provided in the relevant tax scale.
Tax scales must be added via the Tax scales form before they will appear in this list, however you can press the HotEdit key to add new tax scales which will then add them to the list for selection. Tax scales can be selected from a previously created Quicklist by pressing the QuickList Hot Key, which by default is F3.
Reference: text(9)
This is the employee’s tax file number. Whether or not this field is filled in determines how much tax the employee will pay each pay run. In general, if an employee does not have a tax file number, they will be taxed at the highest marginal tax rate, specified in the No TFN tax rate field of the Payroll preferences.
An employee’s tax file number is also used reports such as a Payment Summary (previously called their Group Certificate).
Reference: select from list, HotEdit
This is the name of the entitlement to which an employee belongs, and is alternatively known as an award. An entitlement for an employee is a template identifying which Pay items, Leave type and superannuation amounts to which an employee is entitled. When the details of an entitlement changes, all employees having that entitlement can also have their information updated to reflect the new entitlement details.
When the entitlement of an employee is set, the employee’s Pay items, Leave items and superannuation rates are copied from those specified in the relevant entitlement. From that point, the employee’s Pay items, Leave items and superannuation details are effectively separate from the entitlement and can be modified for individual employees. This is why an entitlement is referred to as a template. When the details of an Entitlement are modified, the Entitlement form provides an Update all employees button which can automatically update the details of any employees assigned to that Entitlement.
Entitlements must be added via the Entitlements form before they will appear in this list, however you can press the HotEdit key to add new entitlements which will then add them to the list for selection.
Reference: select from list, mandatory, HotEdit
This field specifies the Pay frequency associated with this employee. An employee’s pay frequency determines when and how often the employee is paid, and the parameters of the pay frequency can be viewed or changed using the Pay frequency form.
An employee’s pay frequency can be changed at any time because it just determines the next time the employee should be paid. Although warnings will be issued, there is nothing preventing an employee from being paid contrary to their pay frequency.
Pay frequencies must be added via the Pay frequencies form before they will appear in this list, however you can press the HotEdit key to add new pay frequencies which will then add them to the list for selection.
Reference: Yes/no
This option indicates whether or not the employee is included in any Single Touch Payroll (STP) reporting. If this is set, the employee will not be reported in any information sent to the Tax Office through STP. “Don’t report this employee through STP” employees can be added to any pay run, even those that include STP reportable employees and they will not report through STP while the other employees will report as normal.
Last edit 27/10/20
Reference: select from list
Employees now have an Income type selection that defines what kind of income they are earning.
• Salary and wages (SAW) – this is the most common income type and was formerly known as individual non-business (INB)
• Closely held payees (CHP) – applies when the payee is directly related to the employer, such as family members. If you are using the concessions available to closely held payees, you must report these payments under this income type. This type of income was formerly included in SAW.
• Inbound assignees to Australia (IAA) – some multinational payers exchange, or transfer, payees between affiliated entities in different tax jurisdictions. If you are using the concessions available to inbound assignees to Australia, you must report these payments under this income type. This type of income was formerly included in SAW.
• Working holiday makers (WHM) – applies to temporary visitors to Australia who hold a Working holiday visa (subclass 417) or Work and holiday visa (subclass 462).
• Seasonal worker programme (SWP) – applies to regional programmes for government-approved employers, administered by the Department of Employment, Skills, Small and Family Business. This type of income was formerly included in SAW. This does not include workers under the Pacific Labour Scheme which are recorded as SAW.
• Foreign employment income (FEI) – applies to assessable income paid to payees (who are Australian tax residents) that is subject to tax in another country for work performed in that country, if the qualification period is met. There are rules for reporting Foreign Employment Income.
• Voluntary agreement (VOL) – applies to contractors paid under a Voluntary agreement.
• Labour hire (LAB) – applies to payments by a business that arranges for persons to perform work or services, or performances, directly for clients of the entity. Income for contractors only – does not include employees. Employees of labour hire firms should be reported as the relevant income type, such as SAW.
• Other specified payments (OSP) – this is a limited income type that only applies to specified payments by regulation 27 of the Taxation Administration Regulations 2017.
If multiple income types are need for an employee, the income type can be changed in the pay run for each individual employee on any pay run. This allows for the use of multiple income types for each employee.
Reference: text(9)
A 2-character Country code must be reported when using the following income types
• Foreign employment income (FEI)
• Inbound assignees to Australia (IAA)
• Working holiday makers (WHM)
If you make payments to
• An Australian resident working overseas – Use the host country code
• A working holiday maker – Use their home country code
• Inbound assignees – Use the home country code of the foreign entity
A list of countries and their 2-character codes can be seen What are the 2-character Country codes available for Working Holiday Makers (WHM), Inbound Assignees to Australia (IAA), and Foreign Employment Income (FEI) income types?.
Reference: Yes/no
This flag is used to identify that the employee is a Working Holiday Maker (WHM) to the ATO when lodging Single Touch Payroll (STP). Even if you tick this box, you must still ensure that you have selected the correct tax scale for the employee (there are separate WHM tax scales).
Reference: select from list, mandatory
This is the basis on which an employee’s earnings are calculated, and must be either Salary or Hourly rate. This field is not used as a parameter during the calculation of an employee’s pay in a pay run, however it does affect the way the fields following it react when their values are changed as follows:
If Salary is selected, then changing either the normal hours worked or normal days worked will cause the hourly rate to be changed automatically, leaving the annual salary and gross pay per period values untouched.
If Hourly rate is selected, then changing either the normal hours worked or normal days worked will cause the hourly rate to remain unchanged and the annual salary and gross pay per period to be adjusted accordingly.
The field is otherwise used as a reference only.
Reference: quantity
This is the number of hours per day that an employee normally works. This field is used extensively throughout the Payroll subsystem and changing its value must be done with care. One day for an employee is always equivalent to the Normal hours worked for that employee.
The employee’s Normal hours worked determines how an employee’s leave entitlements are converted from hours to days (all employee leave entitlements are stored internally in hours). It is also used to determine leave accrual calculations for the employee if such calculations require conversion from days to hours for an employee or vice versa.
If this field is changed and the employee’s Pay type is Salary, then the employee’s hourly rate will be adjusted automatically based on their annual salary.
If this field is changed and the employee’s Pay type is Hourly rate, then the employee’s annual salary and gross pay per period will be adjusted based on their hourly rate.
Reference: quantity
This is the number of days that an employee normally works per week. This field is used extensively throughout the Payroll subsystem and changing its value must be done with care. One week for an employee is always equivalent to Normal days worked days for that employee.
If this field is changed and the employee’s Pay type is Salary, then the employee’s hourly rate will be adjusted automatically based on their annual salary.
If this field is changed and the employee’s Pay type is Hourly rate, then the employee’s annual salary and gross pay per period will be adjusted based on their hourly rate.
Reference: currency
This is the amount earned annually by the employee, independent of allowances and deductions. This amount must always be shown to the nearest whole dollar.
Whenever this field is changed, the gross pay per period and hourly rate fields will be calculated accordingly based on the values of normal hours worked and normal days worked.
Reference: currency
This is the amount earned by the employee per Pay frequency, independent of allowances and deductions.
Whenever this field is changed, the gross pay per period and hourly rate fields will be calculated based on the values in the normal hours worked and normal days worked fields.
Reference: currency
This is the amount earned each hour that the employee works, independent of allowances and deductions.
Whenever this field is changed, the annual salary and gross pay per period fields will be recalculated based on the values in the normal hours worked and normal days worked fields.
Reference: currency
This is the hourly rate attributed to the employee for job costing. This rate will be used when an employee adds a timesheet entry for a job.
If this field is empty when entering it on the form, it will initially be defaulted to the Pay rate for the employee. When updating an employee, if the field is empty, it will again be defaulted to the employee pay rate.
Reference: currency
This is the rate at which the employee is charged out at for on a per hour basis.
Reference: currency
This is any additional benefit amount per financial year for the employee.
Reference: currency
This is the fringe benefit amount per financial year for the employee. This field is used only as a reference for searches and reports, in particular on the employee’s Payment Summary.
This is the date up to which the employee was last paid, inclusive. The next time the employee is added to a pay run, they will be paid from the day immediately after this date.
When you add a new employee, you can leave this field empty. In this case, the employee’s date started will be used as a reference for the first pay run’s Pay from date for the employee. If you enter a date here, it will be used as the effective last pay date for the employee (even though they have never been paid in this system).
The Last pay date is updated automatically whenever an employee is included in a pay run.
Reference: Yes/no
This indicates that an email is to be sent to the employee when the Print / Email pay slips menu option is selected from the Special menu of the Pay run form.
Email notifications will be sent to the email address specified in the contact details of the employee.
Reference: Yes/no
This indicates that a pay advice report is to be printed for this employee when the Print / Email pay slips menu option is selected from the Special menu of the Pay run form.
The report that is printed for the pay advice is the report that is set as the default report for the Pay run function of the Payroll group.
Reference: Yes/no
This option selects whether or not an employee is eligible to receive employer superannuation contributions on their normal income. If selected, superannuation is automatically calculated in a pay run for this employee for each Pay item that is of type Income.
Reference: select from list, HotEdit
This is the superannuation fund of which the employee is a member.
Super funds must be added via the Super fund form before they will appear in this list, however you can press the HotEdit key to add new super funds which will then add them to the list for selection.
Reference: text(20)
This is the membership number assigned to the employee for their specified superannuation fund. This field is used only as a reference in searches and reports.
Reference: quantity
This is the rate (percentage) at which superannuation will be calculated for an employee. This rate will be automatically filled in when an entitlement is selected for the employee, but it can be manually modified.
Reference: currency
This is the minimum monthly amount that must be earned by the employee for superannuation to be calculated in any given pay run. This amount will be automatically filled in when an entitlement is selected for the employee, but can be modified afterwards.
When superannuation is calculated for an employee in a pay run, the employee’s normal income for that pay run is used to determine whether or not the employee would have earned more than the cut-off amount had they been paid for an entire month at that rate. If not, then no superannuation is calculated for the pay run for that employee.
When super lower monthly threshold for an employee is set to $0, upper monthly thresholds are still taken into consideration, but balancing of total super paid for the month is not.
Reference: currency
This is the monthly limit up to which superannuation is calculated for an employee in any given pay run.
This amount will be automatically filled in when an entitlement is selected for the employee but it can be manually modified.
Reference: currency
This is an annual amount of additional employer superannuation that you want to pay your employee. When a pay run is processed, a portion of this annual amount (based on the pay run period) is calculated and inserted into the “Total extra” field of the pay run details for the employee. This pay run field represents the additional employer-contributed superannuation.
You don’t have to provide any value in this field.
Reference: currency
This is the reportable amount of the annual additional figure above. When a pay run is performed for an employee, the pro rata portion of this value is inserted into the pay run details for the employee into the “Reportable” value at the bottom right of the pay run details.
Reference: Yes/no
This field tells Accentis that this employee is permitted to have timesheet entries entered for them , whether those entries are entered manually or imported from an external timeclock.
Reference: field
This field specifies the number of hours that will be entered automatically into the timesheet when you manually enter timesheets for the employee. When the first timesheet entry for the day for this employee is entered using Job costing >Timesheets, then the value will automatically be placed into the Hours worked column. For manual timesheet entry, this can save a lot of time for those staff who usually work the same hours but for whom you still want timesheet entries recorded. This value will not apply to timesheets that are imported from an external timeclock system.
Reference: field
This option forces Accentis to deduct automatically the specified number of hours from the total quantity recorded against the pay item when automatically transferring timesheet entries into pay runs. The most common use of this is setting 30 mins for lunch when you are also using the Calculate daily hours from first start to last finish option.
For example, setting this value to 30 mins will mean that if someone starts at 07:30 and finished and 15:30, then when their pay is calculated from timesheets, Accentis will calculate this as (1530-0730) 8 hours less 30 mins = 7.5hrs.
Reference: Yes/no
This indicates that the employee’s timesheets are now subject to an approval process.
This means that (a) the employee’s timesheet entries are able to be approved and un-approved via two buttons on the timesheet (without this option, the buttons do not appear) and (b) if the employee’s timesheets have been flagged as “Auto transfer timesheet entries to pay run” then all timesheet entries for the date range covered by the pay run “From date” and “To date” for that employee must be approved before the transfer will occur. If not, the user will receive an error stating that timesheet entries have not been approved and have therefore not been transferred into the pay run.
The field is only available if you have already elected to use the “Allow use in timesheet” option.
Reference: Yes/no
This option tells Accentis to transfer the hours from timesheets to the pay run automatically. When a pay run is created and this employee is added to the pay run, the total number of hours for each Pay Item on the timesheet is used to populate corresponding pay items on the employee’s pay run details. If the timesheet has not specified a pay item (in the Pay Item column), that timesheet entry will not be transferred to the pay run (because it is not known which pay item to use).
- Only timesheet entries that are within the Pay From and Pay To period of the pay run will be included
- If the employee is flagged as requiring timesheet approvals, and there are any entries in the period that have not been approved, then NO data will be transferred (this is for safety)
- When pay items are added to the pay run, they are not merged with any default pay items for that employee (pay items that have been ticked as Include on pay run). This means that any pay items you intend to bring across from timesheets should not also have the Include in pay run tick box ticked
Reference: Yes/no
When you automatically transfer timesheet entries to the pay run, the total number of hours recorded is used typically for the pay item quantity on the pay run. However, if you use timesheets just for time in attendance, and the number of hours recorded is not an indication of time worked, then setting this option will force Accentis to calculate the hours worked as the difference between the first start time and the last stop time and ignore the actual duration worked for each timesheet entry. If you use this option, you may also want to use the Default timesheet deduction per day option.
Reference: Select from list
This indicates what roster the employee will default to when timesheet entries are entered for them.
Reference: memo, expandable
This is a free text field used to specify any relevant allergies for the employee. This field is only used for reference purposes.
Reference: memo, expandable
This is a free text field used to specify any relevant medical conditions for the employee. This field is only used for reference purposes.
Reference: expandable
This is free text that contains any other special conditions of payment or employment of the employee. This is only used as a reference.
Reference: select from list
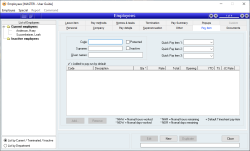
For each employee, up to three Quick pay items can be defined for quick addition / removal of pay items in a pay run for this employee. For each of the Quick pay items, you can assign a Pay item that will appear as a Quick pay item on the Pay run details form for that employee enabling you to add or remove that pay item from the employee’s pay quickly.
An example of the use of Quick pay items is for employees who regularly require the addition of overtime or sick pay items to their pay items for a pay run. Using a Quick pay item allows you to click on the up and down arrows to automatically add or remove one unit of the pay item to the employee’s pay for that pay run.
This is the list of all Pay items for an employee. This list contains any pay item that the employee has ever been paid for the current financial year, as well as any other pay item that should appear by default when a Pay run is performed for the employee.
To prevent old and un-used pay items from displaying from prior years, pay items will only display in this list if:
- Either of the YTD value, opening value or Job cost rate are $0
- The pay item has the Show in timesheet ticked
When you enter a pay item for the first time, if the YTD, opening value or job cost rate are all set to $0 and the item is NOT ticked to show in the timesheet, then on update of the employee, the pay item will be removed again from the list.
The list columns are as follows:
- Added to pay run by default
- Selecting this check box indicates that this pay item is to be added by default for the employee to each pay run where the employee is selected.
- Code
- This is the code of the pay item
- Description
- This is the description of the pay item
- Qty
- This is the qty that will be inserted when the pay item is added to a pay run for the employee. The qty will either be expressed as a number or as one of the following codes:
- NHW (Normal hours worked)
- NHR (Normal hours remaining)
- NDW (Normal days worked)
- NDR (Normal days remaining)
- Default Timesheet pay item
- Rate
- This is the rate per unit of the pay item that will be inserted when this item is added to a pay run for the employee. The rate can either be expressed as a dollar value, or as Hourly or Daily.
- Total
- This is the total amount for the pay item. This field will only be displayed if both the qty and rate fields are expressed as values. If either the qty or rate are expressed as one of the codes stated above, the total will be displayed as "-", indicating that enough information to calculate the total will only be available at the pay run stage
- Opening
- This is the opening value of the pay item for the employee if converting from an existing payroll system. It is important to enter the correct value here because this will ultimately affect the YTD figure for this pay item for the employee. The YTD figures are printed on payment summaries for the employee. This value can be modified by double-clicking on the list entry in Add or Edit mode, and is set to zero when the system is rolled over to a new financial year
- YTD
- This figure represents the total value of this pay item that has accrued for the current financial year. This value is the total of the pay item amounts for all pay runs in the current financial year plus the Opening value
- TS
- This column indicates with a “Y” whether or not the pay item has been set as “Allow use in timesheets” for this employee/pay item. This option can be changed in Edit mode by double clicking on the pay item entry to show the “Adjust pay item” box, in which you can select the “Allow use in timesheets” option. If the option “Default timesheet pay item” has been selected, then the column will show “Y+” indicating that this is the default pay item to be used on timesheets. This option is only available if the pay item represents a unit of measure of HOURS.
- JC Rate
- This is the job costing rate, per hour, that will be used on any timesheet entry for this employee. If not specified, then the employee’s usual job cost rate will be used. This field allow you to override the employee’s usual job cost rate (which is multiplied by the OT factor for T1.5 and T2.0, for example) in cases where the job cost rate is some other value. For example, putting a job cost rate of $0 here ensures that any time this pay item is used on a timesheet, then the job cost rate must be $0. This is appropriate for pay items that are used for leave without pay, lunch, breaks, or any other time you don’t want to recognise a job cost rate. This field is also useful when the cost rate of overtime is not always equal to the multiplier. For example, a pay item of double time does not necessarily cost you double the employee’s base job cost rate, especially if that includes a business overhead that should only be applied once regardless of the time penalty.
If you double-click on one of the Pay item list lines in Idle mode, the Pay item form will be displayed showing details of that pay item.
If you double-click on a line in Add or Edit mode, you will display the Adjust pay item form in which you can adjust the Opening value, Default quantity or default rate.
Last edit 30/10/20
Reference: button
This button allows pay items to be added to the pay items list for the employee. Clicking the button will show the pay item QuickList from which pay items can be selected.
You can select and add multiple pay items at a time.
Reference: button
This button allows selected pay items to be removed from the pay item list for the employee.
You cannot remove pay items from an employee’s pay item list if the Opening or YTD figures for the pay item for that employee are not zero, because the values of the pay item still need to be retained for the employee’s Payment Summary. However, you can un-check the check box for the line, indicating that the pay item should not be added by default to the employee pay run pay items.
Reference: Select from list, Read-only
The documents section allows unlimited documents of virtually any type that relate to a specific record to be linked to that record for easy access. Folders containing multiple documents can also be linked to a specific record in the same manner.
Documents can be added to the list in three different ways. The first is by clicking the add button. Doing so will show the Documents form where the details of the document to be added can be entered. The second method of addition is by pressing the Insert key while on the document list. This will also cause the Documents form to be shown. The final way of adding a document is by simply dragging and dropping the document from its current location. When adding a document via drag and drop, the description used will be the file title of the document. The file title is found by taking the path of the file and removing both the directory structure and the file extension. For example, a document located at C:\ACCENTiS\Documents\Document3A.doc will be given the description of Document3A if added via drag and drop.
This addition process can be conducted whilst the record is in either Idle or Edit mode. Once a document has been added for a record, it appears in the document list accompanied by an icon indicating the document type. This document can then be viewed by simply double-clicking on it in the list.
Entries in the document list can be edited via the Edit button. This will again show the Documents form, allowing you to change the details of the document. The entry in the documents list will be updated automatically to reflect the changes when you return from the Documents form.
To remove an entry from the documents list, first ensure it is highlighted in the list and then either click the remove button, or press the Delete key. You will then be prompted as to whether or not you wish to continue with the removal of the document from the list.
Removing a document from the documents list will NOT cause the document to be deleted from the PC
It is possible to drag /drop multiple documents from a list as well as use the Remove, Copy and Email buttons. When multiple documents are selected, the Change and Open buttons are disabled as these options are only related to individual documents
Last edit: 28/05/20
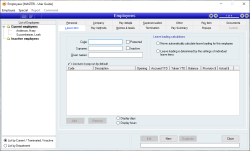
Reference: select from list
This specifies the how leave loading should be calculated when an employee takes leave. The available options are:
- Never automatically calculate leave loading for this employee
- Leave loading is determined by the settings of individual leave items
Reference: list
This is the list of all leave items for an employee. The list contains any leave item that has leave accrued for the employee (whether or not they still accrue that type of leave) as well as any leave items that are to accrue each time the employee is processed in a pay run.
- Check box: Selecting this check box indicates that this leave item will accrue for the employee each time the employee is added to a pay run. The rate and amount of accrual also depends on the pay items that are paid to the employee for the pay run, but if this check box is not checked, the leave will not accrue regardless
- Code: This is the code of the leave item
- Description: This is the description of the leave item
- Opening: This is the opening balance (in terms of the units specified at the bottom of the list) of an employee’s leave entitlement when converting from an existing payroll system. When an end of year rollover is performed on the system, this value is automatically filled with the closing balance from the previous financial year. This field can be modified by double clicking the list entry during Add or Edit mode
- Accrued YTD: This is the amount of leave (in terms of the units specified at the bottom of the list) that has accrued for the employee for the current financial year
- Taken YTD: This is the amount of leave (in terms of the units specified at the bottom of the list) that has been taken by the employee in the current financial year
- Balance: This is the total amount of leave (in terms of the units specified at the bottom of the list) that is owing to the employee. This is calculated as Opening + AccruedYTD - TakenYTD
- Provision $: This figure represents the value of leave that Accentis Enterprise believes should be provided based on the their current rate of pay, current leave accrual and whether or not the employee is entitled to leave loading. It exists as a comparison against the $Actual figure next to it.
- Actual $: This figure represents the actual $Value that Accentis Enterprise has allocated as a provision amount for leave entitlements. The actual values are updated each pay run. This figure may differ from the Provision$ above if, since the last pay run, the employee’s leave entitlement quantity has changed, or their rate of pay has changed, or their leave loading entitlement has changed.
If you double-click on one of the Leave item list lines in Idle mode, the Leave item form will be displayed showing details of that leave item.
If you double-click on a line in Add or Edit mode, you will display the Adjust leave item form in which you can adjust the Opening value.
Reference: button
This button allows leave items to be added to the leave items list for the employee. Clicking the button will show the leave item QuickList from which the leave items can be selected.
You can select and add multiple leave items at a time.
Reference: button
This button removes the currently selected leave item from the Leave items list. You cannot remove a leave item that has a non-zero balance.
This button is only enabled if the highlighted leave item has a balance of zero.
Reference: option button
This option causes values in the leave item list to be displayed in terms of days.
Reference: option button
This option causes values in the leave item list to be displayed in terms of hours.
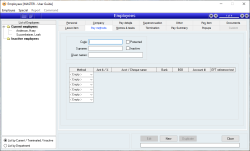
This list displays all of the pay methods that have been assigned to the employee. Each time a pay run for the employee is applied, the net pay for the employee is disbursed according to their payment methods. The payment methods are applied in the order they are displayed.
A Payment method can be in terms of a specific dollar amount or a percentage of the employee’s total net pay. As a rule, it is convenient to make the last pay method line specify 100% of the net pay to ensure that all of the employee’s pay is allocated to a payment method.
Up to six payment methods can be assigned. To remove a payment method, set its Method field to <empty>.
Method
Reference: select from list
This selects the method of payment for this pay method line. It must be one of the following:
- Cash: This indicates that the amount specified for the line is paid by cash. Selecting it will cause the Amt $/% field to become available, in which the dollar amount can be entered
- Cheque: This indicates that the amount specified for the line is paid by cheque. Selecting this option will cause both the Amt $ / % field and the Cheque name field to become available
- Direct: This indicates that the amount specified for the line is paid by electronic direct deposit. Selecting this option will cause all other fields of the pay method to become available in which you must enter the bank details for the deposit
- <Empty>: Indicates that the pay method line is not used
Amt $ / %
This field indicates the amount of the employee’s net pay that will be assigned for the pay method.
Values entered into this field can be interpreted in two different ways. Entering either a numerical value or a numerical value preceded by a $ sign will cause the value to be interpreted as a dollar amount. Entering a numerical value followed by a % sign will cause the value to be viewed as a percentage of the total employee’s net pay.
Acct / Cheque name
Reference: text(40)
The definition of this field is dependent on the Pay method selected.
The field is only available when either the Cheque or Direct methods are chosen. If the pay method selected is Cheque, this field should represent the payee of the cheque. If the pay method selected is Direct, then this field should represent the account name to which the direct deposit will be made.
Bank
Reference: text(64)
This field is only available when the Direct pay method is chosen and represents the bank to which the specified account belongs. The text specified in this field should be the three letter approved financial institution abbreviation, not any other arbitrary bank abbreviation.
BSB
Reference: text(6)
This field is only available when the Direct pay method is chosen and represents the BSB of the bank to which the specified account belongs.
Account #
Reference: text(15)
This field is only available when the Direct pay method is chosen and represents the account number into which the direct deposit will be made.
EFT reference Text
Reference: Text
The text entered in this field will show in the employee's bank transfer details.
Reference: memo, expandable
This field allows you to enter free text notes that are applicable to the next pay run for the employee. You can either edit an employee's record and add these notes manually, click on the Add notes for next pay run option from the Employee menu after selecting the employee from the list, or right click on an employee in the list and select the Add notes for next pay run popup menu.
Notes for the next pay run would typically include information about leave taken during the pay period, or special payments that should be made for some reason.
When the employee is next added to a pay run, a message box will appear when the employee's pay run information is edited informing the user that notes exist for the employee. If the pay run information for the employee is not changed, a message will appear as the pay run is updated informing the user that they have not yet viewed the information about the employee for this pay run. Once the notes have been displayed and the pay run applied, the notes will be removed.
Adding an ! to the start of the notes will keep the message and display on every pay run until the notes are deleted.
This is a list of memos that can be added for an employee to record anything from official warnings given to pay increase information. It displays the date on which the memo was added, the user who added the memo and the memo itself.
If the current user has Admin permissions double clicking on a memo in the list will cause the employee memo form to be shown displaying the desired memo. If the employee record is in Edit mode, you will be able to modify the selected memo.
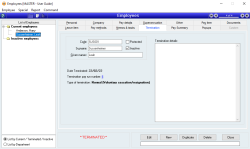
This is the date on which the employee ceased employment. This is not necessarily the last day on which the employee was paid, which may be different in cases when an employee is terminated but has termination settlement payments afterwards.
This field will only show if the employee has been terminated in a pay run. This field cannot be edited.
When the date terminated field is filled with a valid date, the additional termination details will be displayed.
This is the pay run on which the employee was terminated. This is not necessarily the final pay run on which the employee appears, but it is the pay run where the employee’s leave entitlements were paid out and any termination payments made.
This field is filled in automatically when an employee is terminated in a pay run by right-clicking on the employee in a pay run and selecting the Terminate option.
Once an employee has been terminated, the Final pay run number can only be reset by removing that employee from the pay run in which they were terminated.
Reference: select from list
This classifies the type of terminations as follows:
Normal (Voluntary Cessation) – an employee resignation, retirement, domestic or pressing necessity or abandonment of employment.
Normal (Ill Health or medical reason) – an employee resignation due to medical condition that prevents the continuation of employment, such as for illness, ill-health, medical unfitness, or total permanent disability.
Normal (Dismissal) – an employer-initiated termination of employment due to dismissal, inability to perform the required work, misconduct, or inefficiency.
Normal (Contract Cessation) – the natural conclusion of a limited employment relationship due to contract/engagement duration or task completion, seasonal work completion, or to cease casuals that are no longer required.
Normal (Transfer) – the administrative arrangements performed to transfer employees across payroll systems, move them temporarily to another employer (machinery of government for public servants), transfer of business, move them to outsourcing arrangements or other such technical activities.
Redundancy (Genuine) – an employer-initiated termination of employment due to a genuine bona-fide redundancy or approved early retirement scheme.
Deceased (Paid to dependant) – the death of an employee.
Deceased (Paid to trustee of estate) – the death of an employee.
Deceased (Paid to other) – the death of an employee.
The method and circumstances of an employee's termination determine how their final termination payments and unused leave are taxed.
Reference: memo, expandable
This is free text detailing the termination of the employee. This should carry any relevant information that may be required by law or otherwise indicating why and how an employee was terminated.
Reference: currency, read-only
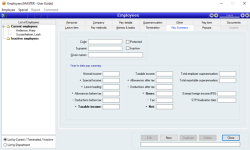
This tab shows a pay summary for the employee up to the end of the current financial year. It is laid out a logical order to show a summarised version of how the employee's salary has been distributed.
The first column shows a summary of what has been earned and deducted BEFORE tax, giving the TAXABLE amount.
The second column shows a summary of what has been earned and deducted AFTER tax, giving the GROSS and NET amounts.
The third column shows the amount of superannuation that has been paid to the employee.
Reference: Text
This field allows you to enter the employees Exempt Foreign Income (EFI) to be included in the YTD figures for STP lodgement.
Reference: Date
Indicates the date on which the employee data was finalised with the ATO for the financial year. This field is updated whenever a finalisation is performed for the employee via the STP Finalisation and Lodgment form.
When you are setting up a new employee, this field should be left empty.
A label will appear below the date indicating if the employee requires finalisation (based on activity and current finalisation date).
Last edit: 10/07/20
Reference: Button
This button toggles the display between the current database’s financial year to date payroll summary (the current financial year is shown on your main window’s status bar), and the next financial year’s summary (the financial year after the one shown on your main window’s status bar). After the end of a financial year, your database will still be recording financial information relative to the financial year stated on the main window’s status bar, even though you are physically operating in the next financial year. The option above allows you to toggle between the pay summary for each of those financial years. A database roll-over allows you to change to the next financial year.
The employee popups work similarly to popups in other functions within Accentis (such as Inventory, Suppliers and Customers). You can specify popup text to appear when an employee is selected on various forms including: Pay run, Timesheet, Users, Human resouces and the Employee form itself. This allows you to warn a user about special employee circumstances or usage. For example, a contractor that has been entered purely for the purposes of timesheets might have an alert displaying on the pay run to indicate to the user that they should not be used in the pay run.
This form is used to add or edit Employee popups. The form is displayed when the Add popup or Change popup buttons are used.
- This popup applies to all employees: Ticking this check box option will mean this popup notification will apply for every employee. When the check box is ticked and hence a notification applies to all employees, an icon (3 people) will display beside the notification in the list of popups table.
- Function: Allows selection of which Accentis function the popup is to apply to. Options include Employees, Human resources, Pay run, Timesheet, Users.
- Notification: This is the text that will be displayed in the popup message. Use F3 to expand the box into a text editor that allow you to change colours and fonts.
- Effective from / to: These are optional dates that indicate a date range between which the popup is to be active.
This table lists the popup notifications related to this employee and shows the function to which it applies, any date range and the text message that will be displayed.
On any popup notification where Apply to all employees has been ticked, an icon (3 people) will appear in the row to the left of the Function type.
Reference: menu
See Human Resources
Reference: menu
This allows you to add notes for specific things you need to remember for the next pay. When the employee is added to a pay run and you click into the employee, a message will be displayed with the details. The note will also be displayed in the Internal Memos field at the top of the form.
Reference: Menu
If set, this will display records that have been set as “Pending delete”. This means that a user has deleted them, but because they are linked to other data and historical records, they are not able to be properly deleted and are put into a “recycle bin”. Under normal circumstances you won’t see these records but the option to “Allow display of deleted records” will make them appear while this window is open. If you close the window, and reopen it, you will need to select the “Allow display of deleted records” option if you wish to see the pending-deleted records again.
Note: Once a record has been permanently deleted (that is, there are no linked records and the data has actually been removed), this option will not show those records.
See Pending delete for more information.
Reference: Menu
Lodges a single touch payroll event for the Pay run with the ATO.
Only users with Administrator permissions on the Single touch payroll function are able to use this menu item.
Last edit 25/06/22
