Setting up Microsoft 365 authentication
Overview
Microsoft 365 authentication is the secure sign-in method used by Microsoft to verify your identity when connecting applications such as Accentis Enterprise to your Microsoft 365 email account.
When you sign in, Outlook uses OAuth, Microsoft's industry-standard authentication technology, to verify your user profile and grant Accentis Enterprise permission to access your email without sharing your password. Instead of providing your password directly to the application, Microsoft issues a secure access token that confirms your identity. This helps protect your account and allows you to revoke access at any time without changing your email password.
This guide explains the initial setup required for your database, as well as the steps each user must follow to authorise their Microsoft 365 account for use with Accentis Enterprise.
Basic steps to setup Microsoft 365 authentication
For IT team
1. Register Accentis Enterprise in the Microsoft Azure Portal
2. Create a secret value for Accentis Enterprise
3. Add permissions for Accentis Enterprise
4. Enter authorisation details into your database
For users
5. Authorise users in Accentis Enterprise
 For IT team
To enable Microsoft 365 authentication in Accentis Enterprise we need to first have your IT team setup your Microsoft 365 tenancy.
This section is for IT staff and administrators who need to:
- Configure Accentis Enterprise to send emails through Microsoft 365 authentication for the first time.
- Refer back to this document to renew the expiry for Accentis Enterprise's authorisation.
1. Register Accentis Enterprise in the Microsoft Azure Portal
- Navigate to Microsoft Azure - Registered Apps and login as an admin user.
- Click New registration.
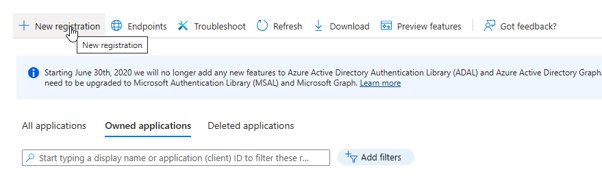
- On the Register an application page, enter the details as below:
- Name - This can be anything. Set it to something that easily identifies that this is for Accentis so that you can refer back to it later.
- Supported account types - Leave this set as it is.
- Redirect URI (optional) - Select "Web" from the dropdown list and enter "http://localhost:3017"
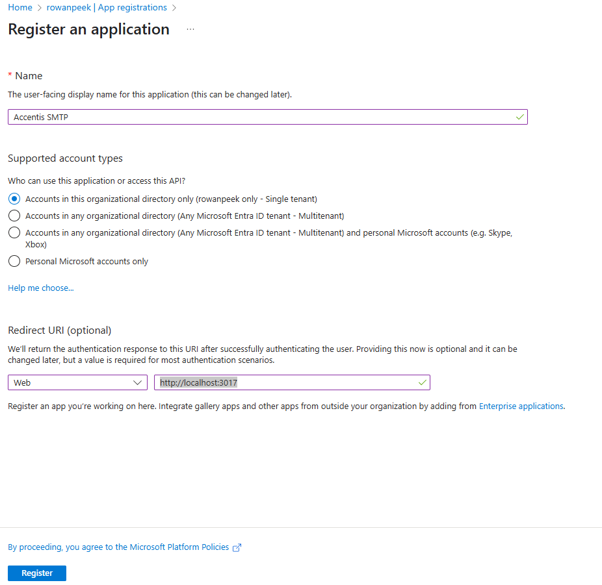
- Select Register.
- Make note of the Application (client) ID and Directory (tenant) ID as you will need to enter these into Accentis Enterprise later.
2. Create a secret value for Accentis Enterprise
- From the navigation menu on the left, select Certificates & secrets and navigate to the Client secrets tab.
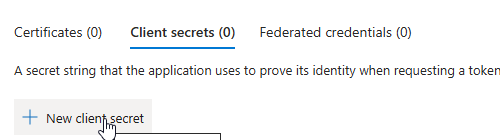
- Select New client secret, and enter the details as below:
- Description - This can be anything. Set it to something that easily identifies that this is for Accentis.
- Expires - Set this based on your organisation's security preferences. You will need to generate a new client secret every time your current one is about to expire to maintain authorisation.
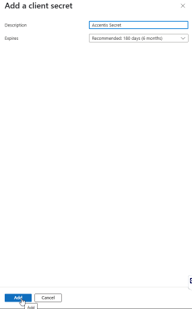
- Select Add.
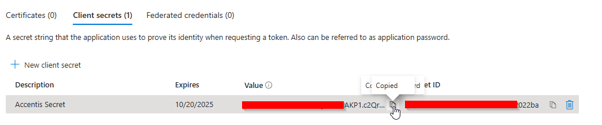
- Copy the secret Value and make note of it as you will need to enter it into Accentis Enterprise later.
- The client secret cannot be accessed again once it is closed. If you forget to copy your secret value, you will need to create a new client secret.
3. Add permissions for Accentis Enterprise
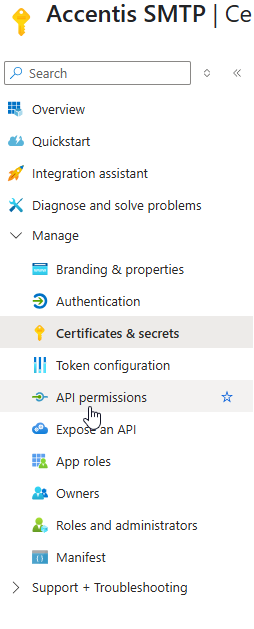
- From the navigation menu on the left, select API permissions.
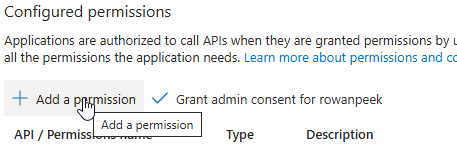
- Select Add a permission.
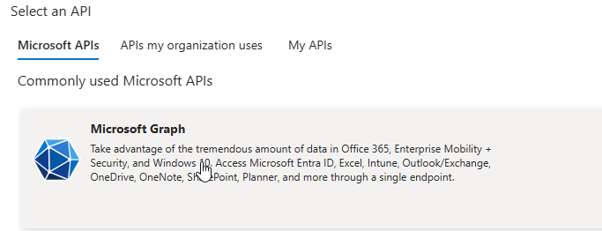
- From the Microsoft APIs tab, select Microsoft Graph.
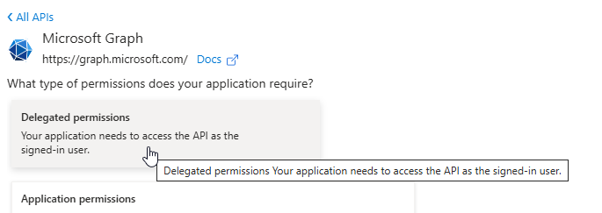
- Select Delegated permissions.
- Search for the permissions you require Accentis Enterprise to have:
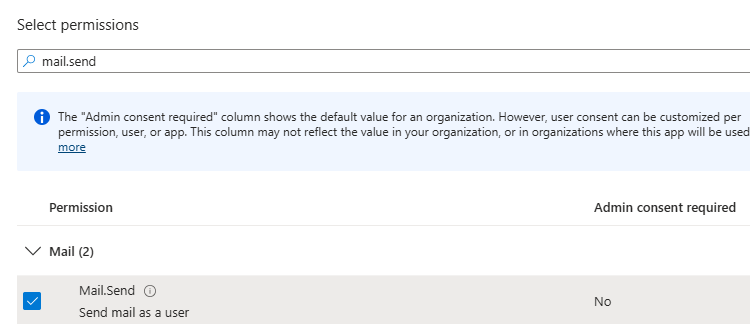
- If you require staff to be able to send emails from Accentis Enterprise, search for and tick Mail.Send
- If you require staff to be able to drag-and-drop emails from New Outlook to Accentis Enterprise, search for and tick Mail.Read
- Select Add permissions.
4. Enter authorisation details into your database
- Log into your Accentis Enterprise database.
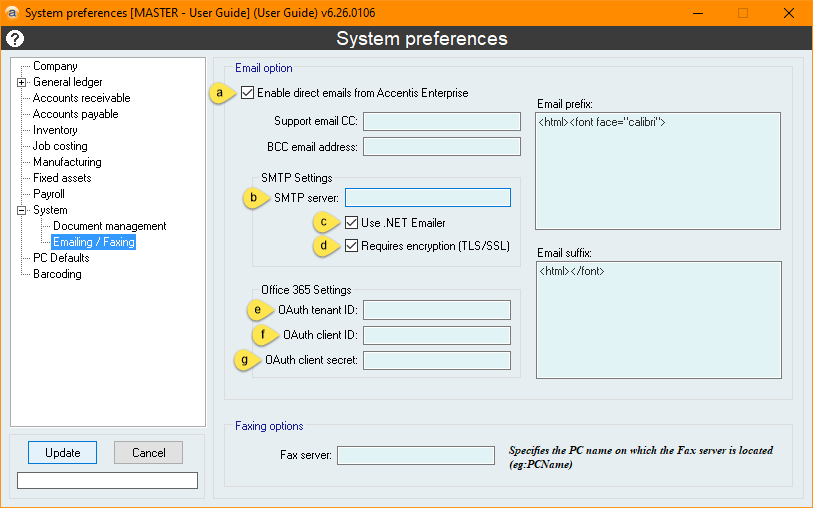
- Navigate to the System preferences form (System > Preferences…) and select System > Emailing / Faxing tab.
- Select Edit and enter the below details:
- Enable direct emails from Accentis Enterprise - Ensure this checkbox is ticked.
- SMTP Server - Enter smtp.office365.com:587.
- Use .NET Emailer - Ensure this checkbox is ticked.
- Requires encryption (TLS / SSL) - Ensure this checkbox is ticked.
- OAuth tenant ID - Enter the Directory (tenant) ID you noted from 1. Register Accentis Enterprise in the Microsoft Azure Portal.
- OAuth client ID - Enter the Application (client) ID you noted from 1. Register Accentis Enterprise in the Microsoft Azure Portal.
- OAuth client secret - Enter the secret value you noted from 2. Create a secret value for Accentis Enterprise.
- Leave the other fields as they are.
For users
Each user that needs Microsoft 365 authentication will need to authorise their account individually. This will only be required once per user as the tokens refresh themselves automatically.
This process needs to be performed by users themselves.
5. Authorise users in Accentis Enterprise
- From the main Accentis toolbar, press CTRL+SHIFT+R and run SA4948.
- Tick one or both of the checkboxes corresponding to the permissions you require.
- These correspond to permissions that have been configured in the For IT team section. If you are unsure which permissions you have available, please contact your IT support or a system administrator.
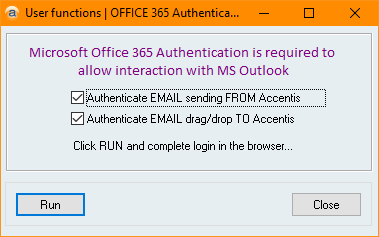
- Select Run to open a Microsoft login screen in your web browser.
- Login with your Microsoft 365 credentials.
- Once logged in, you may be required to accept additional permissions.
- If you're login is successful, you will be redirected to the below page and will receive a Successfully authenticated to Office 365! message in Accentis Enterprise.
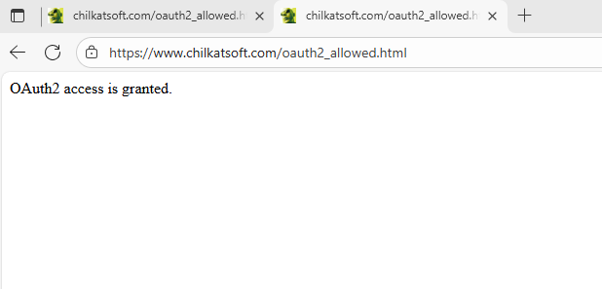
- Your account is now authorised to send emails via Microsoft 365 authentication. In Accentis Enterprise, select File > Exit and log back in for the changes to take effect.
Last edit: 20/10/2026